
Main Courses
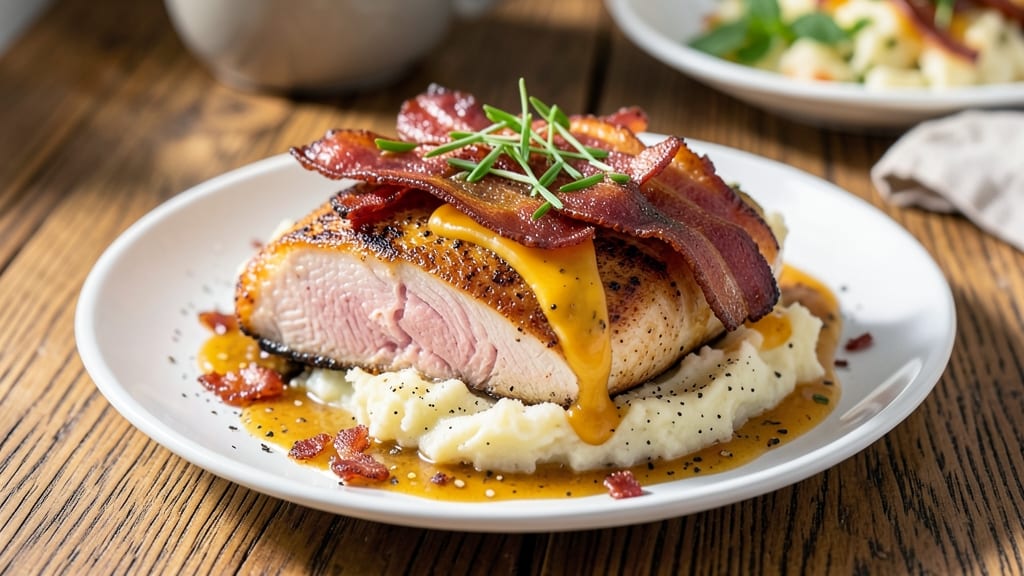
This bacon-wrapped cheese-stuffed chicken breast delivers the ultimate comfort food experience—crispy bacon edges, gooey melted cheese, and juicy chicken that practically falls apart. 🔥 I developed this recipe after years of perfecting the art of keeping chicken moist while achieving that coveted crispy exterior, and the bacon-cheese combo takes it to another level entirely.
The secret lies in the prep: thinly sliced cheese between two chicken breasts creates that pull-apart magic, while the bacon wrap adds smoky richness and irresistible crispiness. This isn't just another chicken recipe—it's a showstopper that transforms weeknight dinners into restaurant-worthy meals without requiring hours in the kitchen.
What you'll end up with is golden, crispy bacon encasing perfectly cooked chicken with melted cheese oozing out at every bite. The technique is straightforward but delivers restaurant-quality results every time, with minimal effort and maximum flavor impact.
Trust me, once you try this, it'll become your new go-to main course.
Pair it with mashed potatoes or a fresh salad for a complete meal that's sure to impress. The best part? Leftovers reheat beautifully, making this the perfect recipe for busy weeknights or meal prep. Let's get cooking!
Ingredients for bacon and cheese chicken breast
This showstopper recipe needs just 12 ingredients to deliver restaurant-quality crispy bacon and gooey cheese perfection.
| Ingredient | Amount | Notes |
|---|---|---|
| Boneless, Skinless Chicken Breast 🍗 | 2 whole | Pounded to even thickness |
| Thinly Sliced Bacon 🥓 | 8 slices | Applewood smoked preferred |
| Sharp Cheddar Cheese 🧀 | ½ cup | Thinly sliced, aged variety |
| All-Purpose Flour 🌾 | ¼ cup | For dredging chicken |
| Large Eggs 🥚 | 1 whole | Room temperature preferred |
| Unsalted Butter 🧈 | 2 tbsp | For cooking chicken |
| Garlic Cloves 🧄 | 2 cloves | Minced for seasoning |
| Fresh Rosemary 🌿 | ¼ tsp | Chopped finely |
| Ground Black Pepper 🌶️ | ½ tsp | Freshly cracked |
| Diamond Crystal Kosher Salt 🧂 | 1 tsp | For seasoning |
| Extra-Virgin Olive Oil 🫒 | 1 tbsp | For basting |
| Fresh Parsley 🌿 | 0.1 cup | Chopped for garnish |
The bacon makes or breaks this dish—applewood smoked slices from Costco or Trader Joe's give that perfect smoky crunch. Look for thick-cut bacon if available (it crisps better), but regular works too. Sharp cheddar is non-negotiable here—Cabot or Tillamook are my go-tos, but any aged variety with good melt will do. The chicken breasts should be similar in size so they cook evenly. Pound them to ¼-inch thickness for even cooking and maximum crispiness. Fresh rosemary adds an unexpected but delicious herbal note—Penzeys bulk section has the best quality if you want to splurge.
No applewood bacon? Hickory or regular smoked bacon works just fine. Short on sharp chedddar? Pepper jack or Gruyère add great flavor too. The flour dredge is key for that crispy exterior—King Arthur or Bob's Red Mill all-purpose flour works best. For the eggs, room temperature makes all the difference (just let them sit out for 30 minutes). Want extra flavor? Add ½ tsp smoked paprika to the flour mixture. The olive oil should be fruity and peppery—none of that cheap supermarket stuff. If you're feeling fancy, wrap the bacon in a single layer around the chicken for even cooking.
Store the bacon-wrapped chicken in the fridge for up to 2 days before cooking—this actually enhances the flavor. The cooked chicken reheats beautifully in a 350°F oven for 10 minutes with a splash of water or chicken broth to keep it moist. Leftovers keep for 3-4 days in the fridge or 3 months in the freezer. For meal prep, assemble the bacon and cheese packages ahead of time and refrigerate—just cook straight from the fridge when ready. The crispiness will be slightly reduced but still delicious.
Why You'll Love This Recipe
- Crispy in Minutes: I swear by this method—just coat the chicken in flour, dip it in eggs, and roll it in crumbs before wrapping it in bacon. No frying, no waiting for breading to set; the bacon crisps up fast and turns the whole thing into a handheld masterpiece.
- Salty-Sweet Magic: That sharp cheddar melts into gooey perfection while the bacon adds a smoky crunch. Honestly, the first bite makes me forget it’s “just” chicken—it’s like a hug for your taste buds, especially when the edges get that golden, caramelized edge.
- Lunchbox Hero: Between us, this is my go-to for meal prep. Slice the cooked chicken, toss it in a container with a side of sauce, and boom—you’ve got a lunch that’ll have coworkers asking for the recipe. (Yes, even on a Tuesday night, when you’re still in pajamas.)
- Budget-Friendly Feast: A single chicken breast stretches further when you wrap it in bacon and cheese, and I’m not kidding—this feeds four for under $15. Leftovers? They reheat beautifully, whether you’re microwaving them for a quick bite or popping them back in the oven for a crispy finish.
Step-by-step instructions for bacon-wrapped cheese-stuffed chicken breast
Here's how to create restaurant-worthy chicken with crispy bacon and melty cheese every time.
👨🍳 Step 1: Pound and Season the Chicken
Place each boneless, skinless chicken breast between two sheets of plastic wrap. Using a meat mallet, pound to an even ½-inch thickness—this ensures even cooking. I press firmly but gently to avoid tearing the meat. Pat dry with paper towels to remove any moisture, which helps the seasoning adhere better.
Create a seasoning blend by mixing 1 teaspoon kosher salt, ½ teaspoon black pepper, and ¼ teaspoon chopped rosemary in a small bowl. Rub this generously over both sides of each chicken breast, pressing the seasoning into the meat. This step is crucial for flavor development and crispy edges later. Let the seasoned chicken rest for 10 minutes at room temperature while you prepare the cheese filling.
🥘 Step 2: Assemble the Cheese-Stuffed Chicken
Slice the ½ cup sharp cheddar cheese into thin strips—about ¼-inch wide and 1-inch long. You'll need roughly 4-5 strips per chicken breast. Lay each chicken breast horizontally on a cutting board and make a shallow vertical cut down the center, stopping about ½-inch from the bottom. This creates a pocket for the cheese without cutting through completely.
Gently open the pocket and slide in 4-5 cheese strips. The cheese should peek out slightly—this ensures melty, pull-apart goodness when cooked. Be careful not to overstuff, or the cheese will leak out during cooking. Close the pocket by pressing the cut edges together firmly. Here's the thing—this is where the magic happens, so take your time to create neat, secure pockets.
🔥 Step 3: Wrap with Bacon and Secure
Cut the 8 slices thinly sliced bacon into strips about 2-inches long. You'll need 4 strips per chicken breast. Wrap each stuffed chicken breast tightly with the bacon strips, overlapping them slightly and securing with toothpicks. I like to start at the bottom and work my way up, making sure the bacon completely encases the chicken. This creates that perfect crispy exterior while keeping the chicken juicy inside.
Place the bacon-wrapped breasts on a wire rack set over a baking sheet. This elevation is key—it allows hot air to circulate underneath, ensuring the bacon gets crispy on all sides. Refrigerate for 15 minutes before cooking. This chilling step helps the bacon hold its shape and prevents the cheese from leaking out prematurely.
🍳 Step 4: Cook Until Golden and Juicy
Preheat your oven to 400°F. In a large oven-safe skillet, melt 2 tablespoons unsalted butter over medium-high heat until foaming. Add the bacon-wrapped chicken breasts and cook for 3-4 minutes per side until the bacon begins to crisp and the chicken releases easily from the skillet. This initial searing creates that beautiful golden crust we're after.
Transfer the skillet to the preheated oven and bake for 18-22 minutes, or until the internal temperature reaches 165°F and the bacon is deep golden brown and crispy. The cheese should be fully melted and the chicken juices should run clear when pierced with a meat thermometer. Don't open the oven during cooking—this maintains even heat and prevents the bacon from becoming soggy.
⏰ Step 5: Rest and Garnish for Maximum Flavor
Remove the chicken from the oven and let it rest on a cutting board for 5-7 minutes. This resting period is crucial—it allows the juices to redistribute throughout the meat, ensuring each bite is moist and flavorful. During this time, carefully remove the toothpicks from the bacon wraps. The bacon should be crispy enough to hold its shape without them.
Garnish each serving with 1 tablespoon chopped fresh parsley and a drizzle of 1 tablespoon extra-virgin olive oil for brightness. Slice each chicken breast horizontally into ½-inch thick medallions, being careful to keep the cheese inside. The result should be crispy bacon, gooey melted cheese, and perfectly cooked chicken in every bite. Serve immediately while the bacon is still crisp and the cheese is melty!
Pro Tips For Making Bacon And Cheese Chicken Breast
- CRISP THE BACON FIRST: I learned this the hard way—cooking bacon alongside the chicken means it gets soggy from the chicken’s juices. Fry the bacon in a cold skillet until fully crisp (about 8-10 minutes), then drain on paper towels. Save that rendered fat for the chicken—it’s liquid gold for flavor.
- BRINE THE CHICKEN: Skip the dry rub if you’re short on time, but don’t skip brining. Toss the chicken breasts in a mix of 1 cup water, 1 tbsp salt, and 1 tbsp sugar for 30 minutes before breading. This keeps them juicy even when wrapped in bacon and cheese—trust me, the texture makes a real difference.
- WRAP TIGHT, DON’T OVERFILL: When rolling the bacon-cheese-chicken log, wrap the bacon snugly but not so tight it cracks the breading. Use about 3 slices of bacon per breast—any more and it’ll steam instead of crisp. Press the edges gently to seal, then chill for 10 minutes before frying. This guarantees the bacon stays crispy, not limp.
- CHILL THE BREADING MIX: I used to dump flour, egg, and seasoning into a bowl and call it good. Now I mix the dry ingredients first, then whisk in the egg and a splash of cold water (about 1 tbsp) to make a thick, sticky paste. Chill the mixture for 15 minutes—this helps the breading stick like glue and cuts down on splatter when frying. (Yes, even if you’re impatient like me.)
Storing and reheating this dish
Fridge Storage Tips
Store your cooked bacon-wrapped chicken in an airtight container with parchment paper between layers to prevent sticking. I like using glass Pyrex containers because they keep the chicken moist longer. The bacon stays crispy for about 2 days in the fridge, though it'll soften slightly after the first day.
Honestly, the cheese stays gooey for longer than I expected—it's one of those surprises that makes this recipe worth making ahead. 🧀
Freezer Prep
For longer storage, wrap each piece tightly in plastic wrap first, then place in a freezer bag with all the air squeezed out. This prevents freezer burn and keeps the bacon from sticking to the bag. Label with the date—3 months is the max for best quality.
When you're ready to eat, thaw overnight in the fridge before reheating. I've found that freezing the fully assembled chicken (before cooking) works just as well as freezing leftovers. ✨
Oven Reheating
Preheat your oven to 350°F and place the chicken on a baking sheet lined with parchment paper. Add 1 tablespoon water or chicken broth to the pan to keep it moist.
Cover loosely with foil and heat for 10-12 minutes, then uncover and crisp for another 2-3 minutes at 400°F. The bacon won't be as crispy as fresh, but it still tastes amazing. For extra flavor, brush with a little olive oil before reheating. 🔥
Microwave Hack
If you're in a rush, use the microwave on 50% power for 1-2 minutes covered with a damp paper towel. Check the internal temperature—it should reach 165°F. Add a splash of water or broth to prevent drying out.
The bacon won't be crispy, but the chicken stays juicy and the cheese remains melty. I only use this method when I'm really short on time, but it's better than cold chicken! ⚡
Bacon Crisp Revival
Want to restore some crispiness to reheated bacon? After cooking, place the chicken on a wire rack over a baking sheet and broil for 1-2 minutes on high. Keep a close eye—it goes from perfect to burnt in seconds.
This works best for fridge-stored chicken, not freezer-thawed pieces. A quick broil makes all the difference when serving to guests. 💫
Nutrition facts
Frequently asked questions
Can I use chicken thighs instead of breasts for this recipe?
While you can use chicken thighs, they'll require different cooking times and techniques. Thighs are more forgiving and stay juicy longer, but they won't get as crispy as breasts. For best results, cook them at 375°F for 25-30 minutes until the internal temperature reaches 165°F. The bacon will crisp up nicely, but the chicken will be more tender than the firm texture of breasts.
What if I don't have toothpicks to secure the bacon?
No problem! Use kitchen twine or even strips of bacon itself to tie the packages together. For extra security, wrap the bacon strips tightly and press them firmly against the chicken. The key is to keep them snug so they don't unravel during cooking. If you're really in a pinch, just press the bacon strips firmly and use a little flour to help them stick.
How do I prevent the cheese from leaking out during cooking?
Can I make this recipe ahead of time?
Assemble the bacon-wrapped chicken packages up to 2 days ahead and refrigerate. Cook them straight from the fridge—just add 2-3 extra minutes to the baking time. For best results, wrap the cooked chicken tightly in plastic wrap and refrigerate for up to 2 days. The bacon will soften slightly but reheats beautifully.
What's the best way to serve this dish?
This recipe shines with classic sides like creamy mashed potatoes, roasted sweet potatoes, or a fresh arugula salad with balsamic dressing. For a heartier meal, serve with buttery corn on the cob or garlic green beans. The crispy bacon and melty cheese make it perfect for sandwiches too—just slice the chicken and stack it on toasted brioche with a drizzle of honey mustard.