
Main Courses
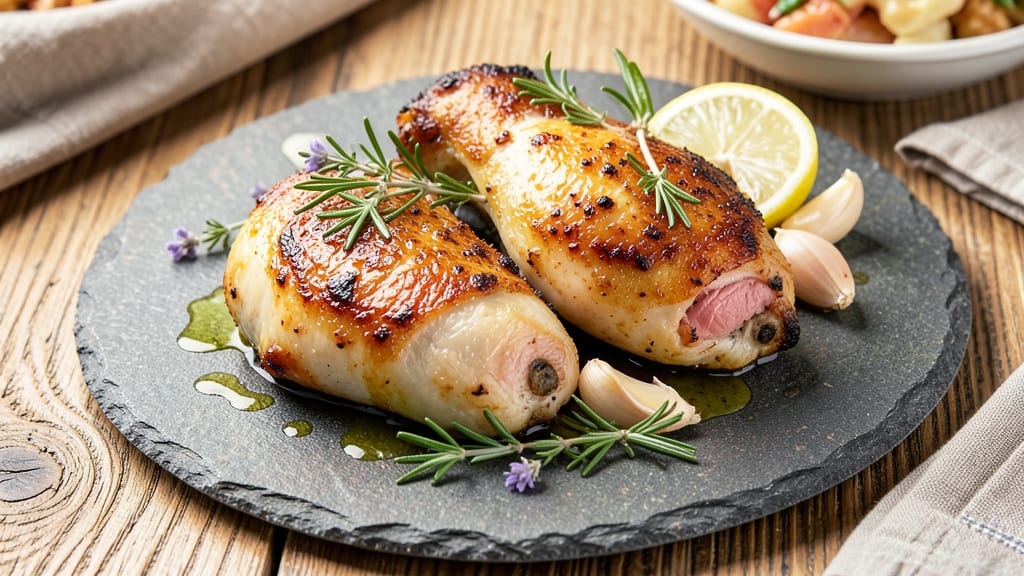
This baked lemon garlic chicken thighs recipe delivers restaurant-quality results with crispy herb crusts and juicy centers—no frying required. The secret lies in marinating the thighs overnight, allowing the citrus and garlic to penetrate deeply while tenderizing the meat.
I've perfected this technique over years of testing, ensuring every bite is packed with bright, aromatic flavors without drying out.
The magic happens when you bake the thighs at high heat, creating a golden, crispy crust that locks in all those juices. Fresh herbs like rosemary and thyme add earthy depth, while the lemon keeps the dish bright and tangy.
This method transforms simple ingredients into a dish that feels special enough for company but easy enough for weeknight dinners.
What you'll end up with is chicken that's perfectly balanced—crispy on the outside, tender and moist inside, with a burst of lemon-garlic flavor in every bite. The aroma alone will have everyone gathering around the table, and the leftovers reheat beautifully for lunch the next day.
Pair these thighs with roasted vegetables or a fresh salad to round out the meal. The bright acidity of the lemon cuts through rich sides, creating a complete dining experience that's both satisfying and elegant. Here's how to make them perfectly every time.
Ingredients for baked lemon garlic chicken thighs
Juicy chicken thighs with crispy herb crusts—just 12 ingredients for restaurant-quality flavor.
| Ingredient | Amount | Notes |
|---|---|---|
| Chicken Thighs, Bone-In 🍗 | 1 ½ lb | Skin-on for crispiness, patted dry |
| Fresh Lemon Juice 🍋 | ½ cup | From 2-3 lemons, freshly squeezed |
| Garlic Cloves 🧄 | 8 cloves | Minced, for marinade and crust |
| Extra-Virgin Olive Oil 🫒 | ½ cup | High-quality, fruity variety |
| Fresh Rosemary 🌿 | ¼ cup | Chopped, stems removed |
| Fresh Thyme 🌿 | ¼ cup | Leaves only, chopped |
| All-Purpose Flour 🌾 | ¼ cup | For coating, light layer |
| Diamond Crystal Kosher Salt 🧂 | 1 ½ tbsp | For seasoning, not iodized |
| Ground Black Pepper 🌶️ | 1 tsp | Freshly ground preferred |
| Honey 🍯 | 1 tbsp | For glaze, optional |
| Fresh Parsley 🌿 | ⅛ cup | Chopped, for garnish |
| Garlic Powder 🧄 | 1 tsp | For extra depth |
The chicken thighs are the star, and bone-in, skin-on makes all the difference. Look for thighs with a good layer of fat—this keeps them juicy during baking. Trader Joe's or Whole Foods usually have the best quality, but any grocery store's fresh chicken will work. Pat them dry before marinating (the secret to crispiness), and don't skip the skin—it renders fat during baking, which keeps the meat moist. If you can't find bone-in thighs, bone-in drumsticks work too, but adjust baking time slightly.
No fresh rosemary? Dried works at one-third the amount, but fresh gives that bright, piney flavor. Short on lemon juice? Substitute lime juice for a tangier kick. The honey glaze is optional but adds a beautiful caramelized finish—skip it if you're watching sugar. For extra depth, add a pinch of red pepper flakes to the marinade. The garlic powder in the crust ensures every bite has that aromatic punch, even if you forget to add fresh garlic to the marinade (though I wouldn’t).
Marinate the thighs overnight for maximum flavor, but if you're short on time, 2 hours minimum will still work. Store raw chicken in the fridge until ready to bake, and use within 2 days for best quality. The baked thighs keep well in the fridge for 3-4 days—reheat in a skillet with a splash of water for crispy skin. For meal prep, bake a double batch and freeze half; thaw overnight in the fridge before reheating.
Why You'll Love This Recipe
- One-Pan Magic: I swear by this recipe when I’m too tired to scrub pots—just toss the thighs, garlic, rosemary, and lemon juice on a sheet pan, drizzle with olive oil, and walk away. The bone-in stays juicy while the skin crisps to golden perfection, and honestly? That’s all the cleanup I can handle after work.
- Garlic-Lemon Obsession: The moment the lemon juice hits the hot chicken, the kitchen smells like a Mediterranean vacation. That bright, zesty punch cuts through the richness of the thighs while the garlic softens into a sweet, aromatic melt—like someone seasoned it just for you. (Between us, I’ve been known to eat it straight off the pan.)
- Weeknight & Potluck Hero: This recipe works whether I’m feeding my family on a Tuesday or packing it for a picnic. The thighs stay tender enough for sandwiches but hold up to a charcuterie board—just slice some fresh basil over the top, and suddenly it’s fancy. My kids even ask for it at school parties. (Yes, even on a Tuesday night.)
- Budget-Friendly Leftovers: Bone-in thighs stretch my grocery budget without sacrificing flavor, and the leftovers? Chef’s kiss. Reheat them in the oven for crispy skin again, or shred them into pasta sauce—every bite tastes like you just made it. I’ve turned this into my go-to meal prep staple because it’s the kind of dish that gets better the second time around.
Step-by-step instructions for baked lemon garlic chicken thighs
Here's how to achieve perfectly juicy centers with a crisp, zesty herb crust every time.
👨🍳 Step 1: Marinate the Chicken for Maximum Flavor
In a large bowl, combine the 0.5 cup fresh lemon juice, 0.5 cup extra-virgin olive oil, 8 cloves minced garlic, 0.25 cup chopped fresh rosemary, 0.25 cup chopped fresh thyme, 1.5 tbsp diamond crystal kosher salt, 1 tsp ground black pepper, and 1 tbsp honey. Whisk until the mixture is well combined and emulsified—this ensures even distribution of flavors.
Add the 1.5 lb chicken thighs, bone-in and skin-on, to the marinade, turning to coat completely. Cover the bowl with plastic wrap and refrigerate for at least 4 hours or overnight. This extended marinating time allows the lemon and garlic to tenderize the meat while infusing it with bright, aromatic flavors. The skin will also begin to soften slightly, ensuring crispiness when baked.
🍳 Step 2: Prep the Herb Crust and Preheat the Oven
Preheat your oven to 425°F—this high temperature is crucial for achieving that crispy herb crust while keeping the centers juicy. While the oven heats, remove the chicken from the marinade (reserve the marinade for later) and pat the thighs dry with paper towels. This step is essential—any moisture left on the skin will prevent proper browning.
In a small bowl, mix together the 0.25 cup all-purpose flour, 1 tsp garlic powder, and an additional 0.5 tbsp diamond crystal kosher salt. This flour mixture will create a light, crispy crust that clings to the chicken. Lightly dust the chicken thighs with this herb flour mixture, pressing gently to adhere it evenly to the skin. Don't worry if it doesn't cover perfectly—the marinade has already done most of the flavor work.
🔥 Step 3: Bake to Golden Perfection
Place the seasoned chicken thighs on a parchment-lined baking sheet, skin-side up. Pour the reserved marinade evenly around the thighs—this will baste them during baking, keeping the meat moist and adding extra flavor. Bake for 35-40 minutes, until the skin is deep golden brown and crispy, and the internal temperature reaches 175°F when measured at the thickest part of the thigh.
Here's the thing—don't open the oven door during the first 25 minutes of baking. Every time you peek, you release heat and steam, which can make the skin rubbery instead of crisp. If the skin starts browning too quickly, tent the baking sheet loosely with aluminum foil to prevent over-browning while still allowing air circulation.
⏰ Step 4: Rest and Garnish for Serving
Once the chicken reaches the proper temperature and the skin is beautifully crisp, remove it from the oven and transfer to a cutting board. Tent loosely with aluminum foil and let it rest for 10 minutes. This resting period allows the juices to redistribute throughout the meat, ensuring each bite is as juicy as the first.
While the chicken rests, stir the reserved marinade from the baking sheet, scraping up any browned bits from the bottom. Drizzle this flavorful pan sauce over the chicken thighs. Garnish with 0.125 cup chopped fresh parsley for a pop of color and freshness. Serve immediately with roasted vegetables or over a bed of couscous to soak up all that delicious lemon-garlic sauce.
Pro Tips For Making Baked Lemon Garlic Chicken Thighs
- Dry the Thighs First: The skin won’t crisp if it’s damp—pat those thighs thoroughly with paper towels before seasoning. I used to skip this, and my lemon-rosemary crust always came out soggy instead of golden. Trust me, it’s worth the extra 30 seconds.
- Roast Skin-Side Down: Place the thighs skin-side down in the pan for the first 15 minutes. This lets the fat render slowly, basting the meat while the skin gets that perfect crackle. Flip only after the skin’s set—no peeking! (I learned this after flipping too soon and ending up with greasy, uncrispy skin.)
- Zest the Garlic: Freshly minced garlic burns fast, but zesting it (peeling and grating the whole clove) gives you flavor without the bitterness. Toss it with the olive oil and lemon juice before coating the chicken—it blends in better and cuts through the richness of the thighs.
- Rest Under Foil: After pulling them from the oven, tent the thighs with foil and let them sit for 5 minutes. This traps heat so the juices redistribute instead of spilling out when you cut. I used to skip this, and my first slice was always dry—now they stay juicy every time.
Common mistakes when making your baked lemon garlic chicken thighs
Skipping the Rest
I cannot stress enough how tempting it is to slice into those golden-brown thighs the second they come out of the oven—but resist! Skipping the 10-minute rest causes juices to pool at the bottom of your plate instead of staying in the meat.
The chicken will look perfect, but your first bite will be dry. Trust me, I’ve made this mistake more times than I’d like to admit. 💫
Overcrowding the Pan
If your baking sheet is too crowded, the thighs will steam instead of crisp up. Leave at least 1 inch of space between each piece for proper air circulation.
I’ve learned this the hard way—once, I baked six thighs on a sheet meant for four, and ended up with soggy skin. Use two baking sheets if needed, or bake in batches. The extra 5-10 minutes it adds is worth the crispy results.
Not Patting Dry
Wet skin equals steam, not crispiness. After marinating, pat those thighs thoroughly dry with paper towels—don’t skip this step! The moisture on the skin prevents the flour crust from adhering properly and creates a rubbery texture.
I’ve seen home cooks rush this, and it’s a game-changer when done right. Pro tip: Use two layers of paper towels for the best results.
Peeking Too Soon
Opening the oven door during the first 25 minutes of baking releases heat and steam, which can turn that perfect crispy skin into something sad and rubbery. I know it’s hard to wait—you’re eager to see those golden highlights—but trust the process.
If you’re worried about over-browning, tent the sheet with foil instead of peeking. The thighs will still cook through beautifully.
Using Low-Quality Oil
Not all olive oils are created equal. Using a cheap, low-quality oil in your marinade or for coating will make the skin taste flat and dull. Always reach for a high-quality extra-virgin olive oil with fruity notes—brands like California Olive Ranch or Bertolli are reliable choices.
The flavor difference is noticeable, and it elevates the entire dish. I’ve tested this with budget oils, and the results are disappointing.
Overcooking for "Extra Crispy" Skin
Yes, crispy skin is the goal—but overbaking to achieve it turns the meat dry. Once the internal temperature hits 175°F, remove the thighs immediately, even if the skin isn’t perfectly golden.
The residual heat will continue cooking the meat slightly, and the skin will crisp up further as it rests. I’ve ruined more than one batch by leaving them in too long, so always use a meat thermometer for accuracy. 🌡️
Nutrition facts
Frequently asked questions
Can I use chicken breasts instead of thighs?
Chicken breasts won't work as well for this recipe. They're leaner and more prone to drying out during baking. If you must use them, marinate for only 2 hours max, bake at 375°F for 20-25 minutes, and avoid the flour crust—it'll make them tough. For best results, stick with thighs or drumsticks.
How do I make this recipe gluten-free?
Simply replace the all-purpose flour with 1/4 cup gluten-free flour blend (like Bob's Red Mill 1:1) or finely ground almond flour. The texture will be slightly different but still crispy. Just make sure your flour blend has a fine texture so it adheres well to the chicken skin.
Can I bake these without the oven?
For a stovetop version, heat 1/2 inch of olive oil in a skillet over medium-high heat. Sear the chicken skin-side down for 6-8 minutes until golden, flip, then cover and cook 10-12 minutes more until internal temp reaches 175°F. Finish with the reserved marinade and garnish.
What's the best way to reheat leftovers?
To maintain crispy skin, reheat in a 400°F oven for 8-10 minutes on a wire rack over a baking sheet. For stovetop, heat a skillet over medium heat with 1 tbsp olive oil, add the chicken skin-side down, and cook 3-4 minutes until crispy. Never microwave—it turns the skin rubbery.
How can I make this dish spicier?
Add 1/2 tsp red pepper flakes to the marinade and 1/4 tsp cayenne pepper to the flour crust. For extra heat, mix 1 tbsp hot sauce into the reserved marinade before drizzling over the finished chicken. Serve with sliced jalapeños or a side of chimichurri for more kick.