
Main Courses
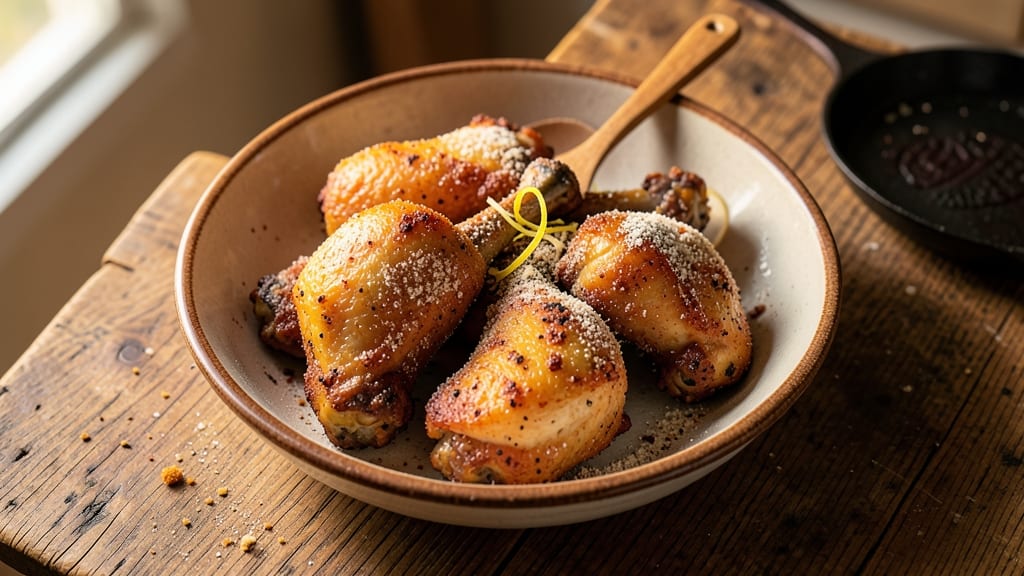
This bone-in fried chicken recipe delivers the perfect balance of a crispy crust and juicy meat—the kind that makes every bite worth the effort. The secret lies in a precise brining technique and a double-dredge breading that locks in moisture while creating that golden, shatteringly crisp exterior.
I’ve perfected this method over years of trial and error, ensuring the skin stays crackling while the meat remains tender all the way through.
The process starts with a simple brine that seasons the chicken deeply, followed by a dry rub that enhances flavor and texture. After a thorough breading—flour, seasoned mix, and a final flour coat—you’ll fry the chicken in hot oil until it reaches an internal temperature of 165°F.
The key is maintaining the right oil temperature and avoiding overcrowding the fryer, which guarantees a perfect golden-brown finish every time.
What you’ll end up with is restaurant-quality fried chicken that’s crispy on the outside and succulent on the inside, with a rich, savory flavor that’s hard to resist. The bone-in technique adds an extra layer of depth, making each piece heartier and more satisfying.
Serve it with classic sides like mashed potatoes, coleslaw, or buttermilk biscuits for a meal that feels like a celebration.
Whether you’re frying in a deep pot, Dutch oven, or even an air fryer, this recipe adapts to your kitchen setup while delivering consistent results. The method is straightforward but requires attention to detail—especially the resting period, which ensures the breading stays crispy and the juices redistribute for maximum flavor.
Let’s get started on achieving that legendary fried chicken experience.
Ingredients for bone in fried chicken
Six essential ingredients create the perfect balance of crispy crust and juicy meat.
| Ingredient | Amount | Notes |
|---|---|---|
| Chicken Thighs, Bone-In 🍗 | 2 ½ lb | With skin on, similar size pieces |
| All-Purpose Flour 🌾 | 2 cups | For first breading layer |
| Cornstarch 🌾 | ½ cup | For extra crispiness |
| Diamond Crystal Kosher Salt 🧂 | 1 tbsp | For the brine |
| Granulated Sugar 🍚 | 1 tbsp | Balances salt in brine |
| Black Peppercorns 🌶️ | 1 tsp | Freshly cracked for rub |
| Garlic Powder 🧄 | 1 tbsp | For dry rub seasoning |
| Onion Powder 🧅 | 1 tbsp | For dry rub seasoning |
| Paprika 🌶️ | 1 tbsp | Smoked for color and flavor |
| Vegetable Oil 🫒 | 4 cups | High smoke point preferred |
| Buttermilk 🥛 | 1 cup | For soaking chicken |
| Lemon Juice 🍋 | 1 tbsp | Brightens flavor in brine |
| Fresh Thyme Leaves 🌿 | ¼ cup | Chopped for dry rub |
The chicken thighs are non-negotiable here—bone-in, skin-on pieces deliver the best flavor and texture. Look for thighs with good marbling at your local butcher or grocery store's meat counter. Perdue or Tyson brands are reliable, but if you can find a local farm source, the flavor will be even better. The skin should be intact and the meat should feel firm to the touch. Avoid any pieces with discoloration or an off smell. For the best results, use thighs that are roughly the same size so they cook evenly—2.5 pounds should yield about 6 pieces.
No buttermilk? Substitute with 1 cup milk plus 1 tbsp vinegar or lemon juice, let it sit for 5 minutes. Running short on fresh thyme? Dried thyme at one-third the amount works in a pinch. The cornstarch is key for that extra-crispy texture—don't skip it—but if you're out, add an extra 0.25 cup flour. For the oil, vegetable or peanut oil are ideal, but canola works too. Just make sure it's enough to submerge the chicken completely. The brine ingredients should be Diamond Crystal kosher salt for proper dissolving—Morton's is finer and can over-salt.
The chicken stays juicy for 2-3 days in the fridge if stored properly—wrap each piece individually in parchment paper before placing in a container. For longer storage, freeze the unbreaded chicken for up to 3 months. Thaw overnight in the fridge before breading. The dry rub mix keeps well for 2 weeks in an airtight container. For a shortcut, make a double batch and store the extra in the freezer—just thaw before using. The crispiness is best enjoyed fresh, but the flavor improves overnight as the juices redistribute.
Why You'll Love This Recipe
- No Fuss Fridays: I swear by this recipe when I’m too tired to measure anything fancy—just flour, cornstarch, and salt. The thighs stay juicy because the bone does the work, and the crust? Crispy without needing a second coat.
- Sweet-Savory Magic: That sugar in the flour mix isn’t just for show—it caramelizes into a golden crust while keeping the inside tender. Honestly, the first bite made me question why I ever bought pre-made.
- Leftovers That Win: This recipe actually improves the next day—crispier edges, same juicy meat. I freeze half for lazy lunches, and no one ever complains. (Yes, even my picky teen.)
- Budget Booster: Bone-in thighs stretch my dollar, and the simple dry brine (just salt) means no fancy marinades. Three pounds feeds four for under $10—no guilt, all flavor.
Step-by-step instructions for bone-in fried chicken
Master the perfect balance of crispy crust and juicy meat with this proven method.
Prepare the Brine and Dry Rub
In a large bowl, combine the 1 cup buttermilk, 1 tbsp lemon juice, 1 tbsp Diamond Crystal kosher salt, and 1 tbsp granulated sugar. Stir until the salt and sugar dissolve completely. This brine tenderizes the meat and adds flavor from the start.
In a separate bowl, mix the 1 tbsp garlic powder, 1 tbsp onion powder, 1 tbsp paprika, and 1 tsp freshly cracked black peppercorns. Finely chop the 0.25 cup fresh thyme leaves and add to the dry rub. This blend creates a flavorful crust that clings perfectly to the chicken.
Soak and Season the Chicken
Place the 2.5 lb chicken thighs, bone-in in a resealable plastic bag and pour the buttermilk brine over them. Seal the bag and refrigerate for 4-12 hours. The acidity in the buttermilk breaks down proteins, keeping the meat tender while the salt enhances flavor. Don't skip this step—it's what makes the difference between good and exceptional fried chicken.
After soaking, remove the chicken from the bag and pat it completely dry with paper towels. This step is critical—any moisture left on the skin will prevent the breading from adhering properly. Next, coat each piece thoroughly with the dry rub, pressing it into the skin so it sticks. Place the seasoned chicken on a wire rack set over a baking sheet and refrigerate uncovered for 30 minutes. This chilling step helps the breading set up for a firmer crust.
Set Up the Double Dredge Station
In one shallow dish, combine the 2 cups all-purpose flour and 0.5 cup cornstarch. The cornstarch creates an extra-crispy texture that regular flour alone can't achieve. In another dish, pour the 4 cups vegetable oil to a depth of about 2 inches in a deep fryer or heavy pot. Heat the oil over medium heat to 350°F, using a thermometer to monitor the temperature. The oil should be hot but not smoking—this ensures a golden crust without burning.
Real talk: Your oil temperature matters more than anything else. If it's too cool, the chicken will absorb oil and become greasy. If it's too hot, the breading will burn before the meat cooks through. Aim for that sweet spot of 350°F and maintain it throughout frying.
Fry to Golden Perfection
Working in batches to avoid overcrowding, dredge each piece of chicken in the flour mixture, pressing gently to adhere the coating. Then, carefully lower the chicken into the hot oil. Fry for 12-15 minutes, turning once, until the chicken reaches an internal temperature of 165°F and the skin is a deep, golden brown. You'll know it's ready when the breading releases easily from the meat and the skin has a crisp texture that snaps when you touch it.
Don't be tempted to flip too soon. The breading needs time to set properly and develop that perfect crunch. If the oil starts to smoke excessively, reduce the heat slightly to maintain the 350°F temperature. As each piece finishes, transfer it to a wire rack set over a paper towel-lined plate to drain excess oil. This keeps the chicken crispy, not soggy.
Rest and Serve Immediately
Let the fried chicken rest for 5 minutes before serving. This brief rest allows the juices to redistribute throughout the meat, ensuring each bite is moist and flavorful. The skin will stay crispy during this time, not soften.
Serve the chicken immediately while it's at its peak temperature. The contrast of the crispy, golden-brown crust with the juicy, tender meat inside is what makes this recipe truly special. Pair with classic sides like mashed potatoes, coleslaw, or buttermilk biscuits for a complete meal that delivers on both texture and flavor.
Pro Tips For Making Bone In Fried Chicken
- Pat the thighs dry: I learned this the hard way—damp chicken skin won’t crisp, no matter how much flour you use. Grab paper towels and really work the skin, especially around the bone crevices where moisture hides. (Yes, even if you're impatient like me.)
- Use a 50-50 flour mix: All-purpose flour alone makes a crust that’s too heavy. Split the difference: half all-purpose, half cornstarch for that perfect balance of crunch and tenderness. I was skeptical until I tried it—now it’s non-negotiable.
- Start hot, finish slow: Blistering the skin at 375°F first gets you that golden crust, but drop to 325°F for the last 10 minutes. Crowding the pan steams the chicken instead of frying it, and that’s how you end up with soggy bones. (Your future self will thank you.)
- Salt the flour generously: Diamond Crystal kosher salt is less dense, so don’t eyeball it—use twice what you’d use with table salt. The crust needs flavor from the inside out, not just the seasoning on top. I skip this when I’m lazy, but the dish is noticeably better when I don’t.
Dietary considerations for bone in fried chicken
Gluten-Free Adaptations
For a gluten-free version, replace the all-purpose flour with a 1:1 gluten-free flour blend like Bob's Red Mill 1-to-1 or King Arthur Measure for Measure. Add 1 tsp xanthan gum to the mix to mimic the binding properties of gluten.
For extra crispiness, I’ve found that adding ¼ cup cornstarch to the blend helps replicate the texture. Just be sure to use a fine-mesh strainer to coat the chicken evenly. 🌾
Low-Carb Options
Skip the flour entirely and use a low-carb breading made from almond flour and crushed pork rinds in a 1:1 ratio. The pork rinds add crunch while keeping carbs minimal. For flavor, mix in 1 tbsp nutritional yeast and ½ tsp garlic powder before dredging.
This method works surprisingly well—just fry at 375°F for 14-16 minutes to avoid burning the almond flour. The result is crispy, flavorful, and keto-friendly.
Allergen-Friendly Swaps
If you're avoiding dairy, substitute the buttermilk brine with 1 cup unsweetened almond milk plus 1 tbsp apple cider vinegar. For a nut-free option, use oat milk instead. For those with egg allergies, the dry rub and breading can remain the same—just ensure all ingredients are certified egg-free.
Always check labels on spices and cornstarch, as cross-contamination can occur. I’ve tested this method with Penzeys Spices and Bob’s Red Mill products, which are typically safe for allergies. 💡
Spicy or Mild Adjustments
For a spicy kick, add ½ tsp cayenne pepper or 1 tbsp smoked paprika to the dry rub. For a milder heat, reduce the cayenne to ¼ tsp and add ½ tsp celery salt for depth.
If you love tangy flavors, brush the fried chicken with a honey-mustard glaze (mix 2 tbsp Dijon mustard with 1 tbsp honey) after frying for extra zing. The key is balancing heat with sweetness to keep the crust from becoming too harsh. 🌶️
Protein Alternatives
While bone-in chicken thighs are ideal, you can adapt this recipe for chicken breasts (use 1.5 lbs) or even turkey thighs (add 5 extra minutes to frying time). For a vegetarian option, try cauliflower "chicken" cut into thigh-sized pieces.
Soak them in the buttermilk brine for 30 minutes (no need for overnight soaking) and fry at 375°F for 10-12 minutes
Nutrition facts
Frequently asked questions
Why use bone-in chicken thighs instead of boneless?
The bone adds incredible flavor and moisture during cooking, creating a richer, more satisfying bite. Bone-in thighs stay juicier longer because the bone acts like a natural insulator, while the skin-on pieces develop that signature crispy texture. Plus, the bone adds heartiness that boneless pieces simply can't match.
Can I use chicken breasts instead of thighs?
You can try, but thighs work best for this recipe. Chicken breasts cook faster and dry out more easily, especially with the bone-in method. If you must use breasts, reduce the frying time to 8-10 minutes and use thinner cuts. For best results, stick with thighs—they're more forgiving and deliver that perfect crispy-juicy balance.
How do I keep the breading from falling off?
Proper drying is key—pat the chicken completely dry after brining, and don't skip the 30-minute chilling step after seasoning. The cornstarch in the flour mixture helps create an extra-sticky coating. Also, work in small batches to avoid overcrowding the fryer, which can cause uneven cooking and breading detachment. Press the coating firmly during dredging!
What's the best oil for frying?
Use a high-smoke-point oil like vegetable, peanut, or canola oil. These oils maintain stability at 350°F without burning. Avoid olive oil—its low smoke point makes it unsafe for deep frying. For extra crispiness, I recommend peanut oil as it has a slightly higher smoke point and adds a subtle flavor. Always use enough oil to submerge the chicken completely.
How do I reheat leftover fried chicken?
Never microwave—it makes the breading soggy! Instead, reheat in a 375°F oven for 10-12 minutes on a wire rack to maintain crispiness. For extra crunch, broil for 1-2 minutes at the end. If using an air fryer, reheat at 375°F for 4-5 minutes. The goal is to restore crispiness without steaming the meat.