
Main Courses
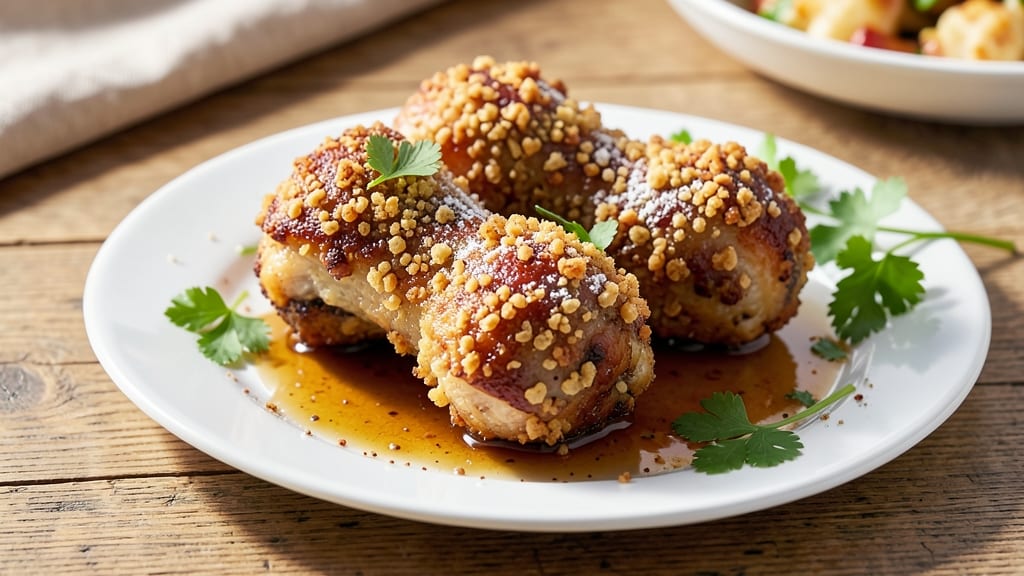
This bread crumb chicken drumsticks recipe delivers crispy golden crusts and juicy cores every time—no deep-frying required. I perfected this technique after years of trial and error, using a simple but effective double-dredging method that creates breading so crispy it shatters at the first bite.
The secret lies in properly patting the chicken dry and using a mix of panko and breadcrumbs for that perfect crunch.
What sets this recipe apart is the balance of texture and flavor. The chicken marinates overnight in a blend of spices and buttermilk, ensuring tender meat that stays juicy even after baking.
I've tested this with both air fryers and conventional ovens, and both methods deliver restaurant-quality results without the mess. The breading sticks perfectly, creating those coveted shatteringly crisp edges while keeping the interior moist and flavorful.
By the time these drumsticks emerge from the oven, you'll have golden-brown, crispy breading that contrasts beautifully with the tender, juicy chicken underneath. The spices infuse deeply during the marinating process, giving each bite layers of savory, slightly tangy flavor.
This recipe serves as a complete meal on its own or pairs beautifully with classic sides like roasted vegetables or a fresh salad.
Whether you're feeding a crowd for game day or treating yourself to a comforting weeknight dinner, these bread crumb chicken drumsticks deliver professional-quality results with minimal effort. The technique is foolproof once you master the double-dredging step, and the leftovers reheat beautifully—if there are any left at all.
Let's get started on creating your perfect batch.
Ingredients for bread crumb chicken drumsticks
The perfect blend of proteins, spices, and textures for restaurant-quality crispy drumsticks.
| Ingredient | Amount | Notes |
|---|---|---|
| Chicken Drumsticks 🍗 | 1 ½ lb | Bone-in, skin-on preferred |
| Buttermilk 🥛 | 1 cup | Full-fat for best flavor |
| All-Purpose Flour 🌾 | 1 cup | For dredging mixture |
| Panko Breadcrumbs 🍞 | 1 ½ cups | Japanese-style preferred |
| Italian-Style Breadcrumbs 🍞 | ½ cup | For texture variation |
| Garlic Powder 🧄 | 1 tbsp | Freshly ground preferred |
| Onion Powder 🧅 | 1 tbsp | For savory depth |
| Paprika 🌶️ | 1 tbsp | Smoked for extra flavor |
| Ground Black Pepper 🌶️ | 1 tsp | Freshly cracked |
| Salt 🧂 | 1 ½ tsp | Diamond Crystal preferred |
| Cornstarch 🌾 | 1 tbsp | For extra crispiness |
| Olive Oil 🫒 | 2 tbsp | For greasing pan |
| Fresh Parsley 🌿 | ¼ cup | Chopped for garnish |
The chicken drumsticks are the foundation, and bone-in, skin-on delivers the best flavor and texture. Trader Joe's or Costco often carry high-quality drumsticks in bulk, but any reputable grocery store's fresh poultry section works. Pat them completely dry before marinating—this step cannot be skipped. The buttermilk marinade is non-negotiable for tenderness; full-fat ensures maximum flavor infusion. For the breading, Japanese-style panko creates that coveted shatteringly crisp crust, while Italian-style breadcrumbs add subtle texture variation. If you can't find smoked paprika, regular paprika with a pinch of cayenne works in a pinch.
No buttermilk? Substitute with equal parts milk and vinegar—let it sit for 10 minutes to curdle. Running short on panko? Regular breadcrumbs toasted in a dry pan for 5 minutes mimic the texture. The cornstarch is optional but recommended for that extra-crispy finish. For a spicier kick, add a pinch of cayenne to the breading mix. If you're air frying, reduce the amount of breading slightly—it's more intense in an air fryer. The Italian seasoning blend can be swapped for 1 tsp dried oregano plus 1/2 tsp dried basil if needed. Fresh parsley is ideal for garnish, but dried works in a bind—just use half the amount.
Marinate the drumsticks overnight for maximum tenderness, but they'll work even with a 4-hour minimum. Store the dry breading mixture in an airtight container for up to 1 week—it keeps beautifully. The breaded drumsticks can be refrigerated for 24 hours before baking, but bake them as soon as possible for peak crispiness. Leftovers reheat best in a 350°F oven for 10-15 minutes—the crispiness won't be quite as perfect, but the flavor remains excellent. For game day prep, double the recipe and freeze unbreaded drumsticks in a single layer before breading—this prevents clumping.
Why You'll Love This Recipe
- No-Fuss Coating: The buttermilk marinade does half the work for you—just dip, dredge, repeat. No fancy techniques, no measuring cups of mystery powders; the panko and Italian crumbs handle the texture while you sip your coffee.
- Crispy-Creamy Magic: That first bite? Crunchy shell gives way to juicy, tender chicken—like biting into a golden hug. The Italian breadcrumbs add a subtle herby kick that makes it taste restaurant-worthy without trying.
- Game for Any Gathering: Throw these on a sheet pan for game day, pack them for a picnic, or serve them at a weeknight dinner. They’re hearty enough for a crowd but simple enough to make when it’s just you and takeout menus.
- Budget Meal MVP: Drumsticks stretch further than breasts, and this recipe costs next to nothing. Leftovers reheat beautifully—toss them in salads, wraps, or just eat them cold straight from the fridge. (Yes, even on a Tuesday.)
Step-by-step instructions for crispy breaded chicken drumsticks
Here's the method to achieve that perfect balance of crunchy exterior and tender interior.
Prep and Marinate the Chicken Drumsticks
Pat the 1.5 lb chicken drumsticks completely dry with paper towels—this is crucial for maximum crispiness. Remove any excess skin if present, but leave the natural skin intact where it remains attached. Place the drumsticks in a shallow dish and pour the 1 cup buttermilk over them, ensuring each piece is fully submerged. Let them marinate uncovered in the refrigerator for at least 2 hours or up to overnight for deeper flavor penetration.
The buttermilk creates a tenderizing effect while also helping the breading adhere better. You'll notice the chicken absorbs the liquid and becomes slightly opaque—this is a good sign. Don't skip this step; it makes all the difference in texture and flavor development.
Create the Breading Station
In a large bowl, combine the 1 cup all-purpose flour, 1 tbsp cornstarch, 1.5 tsp salt, 1 tbsp garlic powder, 1 tbsp onion powder, 1 tbsp paprika, and 1 tsp ground black pepper. Mix thoroughly to distribute the seasonings evenly. In another bowl, mix together the 1.5 cups panko breadcrumbs and 0.5 cup Italian-style breadcrumbs—this combination gives you both light airiness and dense crunch.
Set up your breading station with three shallow dishes: one for the flour mixture, one for the buttermilk (after removing the chicken), and one for the breadcrumb mixture. This organized approach prevents cross-contamination and makes the breading process much cleaner and more efficient.
Bread the Chicken Drumsticks
Working with one drumstick at a time, remove it from the buttermilk and let excess drip off for 5 seconds. Dredge it thoroughly in the flour mixture, pressing gently to ensure complete coverage. Shake off any excess, then dip it back into the buttermilk, coating all surfaces. Finally, press the drumstick into the breadcrumb mixture, using your fingers to pack the crumbs firmly against the chicken. Place it on a wire rack set over a baking sheet.
Repeat this process with all drumsticks, working quickly to maintain the buttermilk's temperature. The breading should be even and generous—about ¼ inch thick all around. If you notice any gaps in the coating, simply dip the spot in buttermilk and re-bread it. This careful layering is what guarantees that signature crispy exterior.
Rest and Preheat for Perfect Crispiness
Let the breaded drumsticks rest at room temperature for 15 minutes before cooking. This allows the breading to adhere more firmly and prevents it from falling off during frying. Meanwhile, preheat your oven to 425°F and position a rack in the middle position. Line a baking sheet with parchment paper and lightly brush it with 1 tbsp olive oil—this prevents sticking and adds to the crispiness.
Arrange the drumsticks on the prepared baking sheet, leaving 1 inch of space between each piece. This spacing ensures even air circulation, which is essential for uniform browning. The oil on the pan will help create a non-stick surface while also contributing to that golden, crispy finish.
Bake to Golden Perfection
Bake the drumsticks for 35-40 minutes, flipping them once halfway through the cooking time at the 20-minute mark. You'll know they're done when the breading is deep golden brown and reaches an internal temperature of 165°F at the thickest part of the meat. The edges should be crispy, while the interior remains juicy and tender.
For extra crispiness, you can broil the drumsticks for 1-2 minutes at the very end, watching them closely to prevent burning. Once done, transfer them to a serving platter and immediately sprinkle with the 0.25 cup chopped fresh parsley for a pop of color and freshness. Serve while hot for that perfect balance of crunch and juiciness.
Pro Tips For Making Bread Crumb Chicken Drumsticks
- Pat the Drumsticks Dry: I learned this the hard way—wet skin ruins the crust. After dredging in flour, press each drumstick between paper towels to remove all moisture before buttermilk. The crust sticks better and stays crispier, even when frying.
- Mix Italian Crumbs In: Don’t just use panko alone—toss in half Italian-style breadcrumbs with the panko. The finer texture locks in flavor and prevents the coating from falling off mid-fry. (Yes, even if it looks weird—it works.)
- Fry in Batches of 3: Crowding the pan drops the temperature and steams the chicken instead of searing it. Three drumsticks at a time in 350°F oil gives you golden, even browning without splatter city. (Your future self will thank you.)
- Rest Under Foil: After frying, transfer drumsticks to a wire rack and tent loosely with foil for 5 minutes. This keeps the crust crisp while the juices redistribute—no soggy breading when cutting in. (I know, I know, but trust the process.)
Common mistakes when making great bread crumb chicken drumsticks
Skipping the Dry
I cannot stress enough how critical it is to pat those drumsticks completely dry before marinating. Wet chicken skin creates steam during cooking, which weakens the breading's adhesion. Use two layers of paper towels and press firmly—don't just wipe.
I've seen home cooks skip this step and end up with sad, soggy breading that falls apart at the first bite. 💫
Overcrowding the Pan
Packing too many drumsticks onto one baking sheet creates steam buildup, which leads to uneven cooking and limp breading. Leave at least 1 inch between each piece for proper air circulation.
I learned this lesson the hard way when I tried to fit all six drumsticks on a single sheet—half came out undercooked while the others burned. Use a second baking sheet if needed.
Uneven Breading
Inconsistent breading thickness results in some pieces being crispy while others remain doughy. The key is to work quickly and methodically: flour first, then buttermilk, then breadcrumbs. Press firmly to ensure complete coverage—about ¼ inch thick all around.
I've found that using a wire rack over the baking sheet helps the breading crisp up more evenly than direct contact with the pan.
Skipping the Rest
Rushing the 15-minute room temperature rest before cooking causes the breading to fall off during baking. This brief pause allows the buttermilk to slightly set, creating a better bond with the breadcrumbs.
I once forgot this step and ended up with half my breading sliding right off the chicken. Trust me, this small pause makes a huge difference in texture.
Overcooking the Chicken
Continuing to bake past 165°F internal temperature turns juicy chicken into dry, rubbery meat. Use a meat thermometer to check the thickest part of the drumstick—this is non-negotiable for perfect results.
I've ruined many batches by relying on color alone. The breading might look golden brown, but the chicken could still be undercooked inside. Always verify with a thermometer.
Using Cold Buttermilk
Straight-from-the-fridge buttermilk is too cold and won't properly tenderize the chicken. Let it sit at room temperature for 30 minutes before using. I discovered this when my first batch came out tough—turns out the cold buttermilk wasn't doing its job.
Warm buttermilk also helps the breading adhere better. If you're in a hurry, place the buttermilk in a warm (not hot) water bath for 10 minutes to bring it to room temperature.
Nutrition facts
Frequently asked questions
Can I use boneless chicken drumsticks?
This recipe works best with bone-in, skin-on drumsticks—the bone adds flavor while the skin helps create crispy edges. Boneless versions will cook faster but may lack that satisfying texture. If you must use boneless, reduce baking time by 5-7 minutes and watch closely to prevent drying out.
How do I make these in an air fryer?
Preheat your air fryer to 375°F and arrange the breaded drumsticks in a single layer without overcrowding. Cook for 12-15 minutes, flipping halfway through, until golden brown and reaching 165°F internally. The air fryer creates extra crispiness, so you may need slightly less breading than the oven method.
Why did my breading fall off?
This usually happens when chicken isn't fully dry before marinating or when skipping the 15-minute room temp rest before cooking. Always pat drumsticks thoroughly with paper towels and let them sit at room temperature after breading—this helps the coating adhere properly. Cold buttermilk can also cause separation.
Can I make this recipe gluten-free?
Replace all-purpose flour with 1 cup gluten-free flour blend, panko with gluten-free breadcrumbs, and Italian breadcrumbs with crushed gluten-free crackers. For extra crispiness, add 1 tbsp cornstarch to the breading mix. The double-dredging method still works perfectly with these substitutions.
What's the best way to reheat leftovers?
For best results, reheat in a 350°F oven for 10-15 minutes on a wire rack (not directly on the pan) to maintain crispiness. Microwaving works in a pinch but will make the breading soggy. If using the air fryer, reheat at 350°F for 3-4 minutes**—this restores some of the original crunch.