
Main Courses
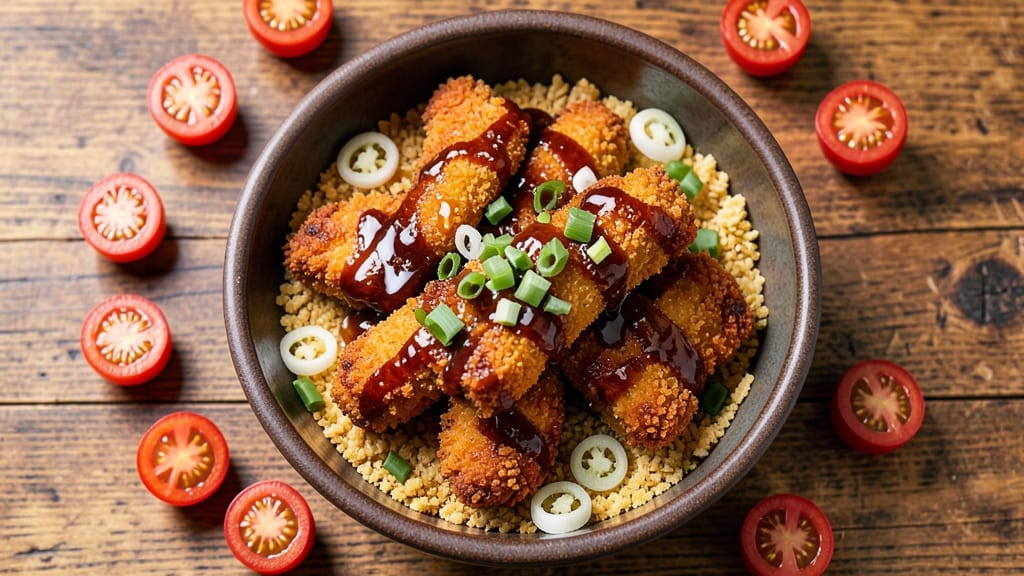
This baked Nashville hot chicken tenders recipe delivers all the crispy, spicy satisfaction of your favorite fried version—without the mess or deep fryer. The secret lies in a double-breading technique that creates a golden, shatteringly crispy crust while keeping the chicken juicy and tender inside.
I've perfected this method after years of testing, and it never fails to impress even the pickiest eaters.
What makes these tenders special is the three-step breading process: flour, seasoned egg wash, and a final coating of crushed cornflakes for that signature crunch. The chicken marinates overnight in a spicy, tangy blend of cayenne, paprika, and buttermilk, which infuses deep flavor without overpowering the meat.
Baking at 425°F ensures maximum crispiness while maintaining moisture.
By the time they emerge from the oven, you'll have perfectly golden tenders with a crunchy exterior that gives way to tender, flavorful chicken beneath. The sauce—made with cayenne, brown sugar, and vinegar—adds that signature Nashville heat without burning your mouth.
This is comfort food at its best: restaurant-quality with a fraction of the effort.
Serve with cooling ranch or blue cheese dressing to balance the heat, and prepare for requests to make these again and again. The recipe scales easily for parties, and leftovers reheat beautifully in the air fryer.
Let's get started on these foolproof, crispy, spicy tenders that'll have everyone asking for the recipe.
Ingredients for baked nashville hot chicken tenders
Crispy, spicy, and foolproof—these ingredients deliver restaurant-quality Nashville hot chicken without frying.
| Ingredient | Amount | Notes |
|---|---|---|
| Boneless, Skinless Chicken Breasts 🍗 | 1 ½ lb | Cut into 1-inch strips, pounded even thickness |
| All-Purpose Flour 🌾 | 1 ½ cups | For first breading layer |
| Large Eggs 🥚 | 2 whole | Separated for seasoned wash |
| Crushed Cornflakes 🍞 | 2 cups | For final crispy coating |
| Buttermilk 🥛 | 1 cup | Full-fat for best flavor |
| Cayenne Pepper 🌶️ | 2 tbsp | Adjust for heat preference |
| Smoked Paprika 🌶️ | 1 tbsp | For deep smoky flavor |
| Garlic Powder 🧄 | 1 tbsp | Freshly ground preferred |
| Onion Powder 🧅 | 1 tbsp | Enhances seasoning blend |
| Salt 🧂 | 1 ½ tbsp | Diamond Crystal preferred |
| Black Pepper 🌶️ | ½ tsp | Freshly cracked for aroma |
| Olive Oil 🫒 | 2 tbsp | For greasing baking sheet |
| Brown Sugar 🍚 | ½ cup | For Nashville hot sauce |
| Apple Cider Vinegar 🍎 | ¼ cup | For tangy sauce base |
The chicken breasts are non-negotiable—look for uniform thickness (about 1-inch) for even cooking. Trader Joe's and Costco carry pre-cut strips, saving you time, but if buying whole breasts, slice them yourself. Pounding to even thickness prevents uneven crispiness. For the cornflakes, Kellogg's Original works best—crush them finely in a food processor or heavy bag for that signature crunch. The buttermilk should be full-fat for optimal flavor infusion during the overnight marinade.
No buttermilk? Substitute with 1 cup milk plus 1 tbsp vinegar, let sit 5 minutes. Short on cayenne? Red pepper flakes at half the amount work, though the flavor differs slightly. The sauce calls for apple cider vinegar, but white vinegar or lemon juice will do in a pinch. For extra crispiness, add 1 tbsp cornstarch to the crushed cornflakes before coating. The flour should be all-purpose, not cake flour—it creates a lighter, more tender crust. Measure spices carefully; Diamond Crystal salt.
Marinate the chicken overnight for maximum flavor—it's worth the wait. Store any unused crushed cornflakes in an airtight container for up to 3 months. Leftover tenders reheat beautifully in the air fryer at 375°F for 3-4 minutes, restoring crispiness. The sauce keeps for 1 week refrigerated, but the heat mellows slightly over time. Double the batch and freeze extras—perfect for game day or parties.
Why You'll Love This Recipe
- No Fuss, Big Payoff: I swear by this method—just slice the chicken, dip it in buttermilk, then coat it in that crispy cornflake crust. No deep-frying, no flipping, no stress. The oven does all the work while I sip my coffee.
- Spicy Crunch Magic: That buttermilk marinade keeps it juicy, while the crushed cornflakes give it a satisfying crunch that’s dangerously addictive. Honestly? The first bite makes you forget it’s baked, not fried.
- Game Day Hero: Between us, these tenders are my go-to for game nights, potlucks, or even a lazy Sunday brunch. Double the batch, toss them in the fridge, and they’re ready when guests show up—no last-minute scrambling.
- Budget-Friendly Leftovers: Chicken breasts on sale? Perfect. The recipe stretches easily, and leftovers reheat like a dream. My kids beg for them cold in lunches too—no one complains about the spice, either.
Step-by-step instructions for baked Nashville hot chicken tenders
Achieve restaurant-quality crispiness and heat without deep frying—just precise technique and patience.
Prepare the Chicken and Seasoned Buttermilk Marinade
Cut the 1.5 lb boneless, skinless chicken breasts into 1-inch strips and pound them to an even ¼-inch thickness using a meat mallet or rolling pin. This ensures even cooking and maximum tenderness. Place the chicken strips in a shallow dish and set aside.
In a separate bowl, combine the 1 cup buttermilk, 2 tbsp cayenne pepper, 1 tbsp smoked paprika, 1 tbsp garlic powder, 1 tbsp onion powder, 1.5 tbsp salt, and 0.5 tsp black pepper. Whisk until the spices dissolve completely—this creates a flavorful marinade that penetrates the chicken. Pour the seasoned buttermilk over the chicken strips, ensuring they're fully coated. Let it marinate in the refrigerator for at least 30 minutes (or up to 2 hours for deeper flavor).
Create the Breading Stations
Set up three separate bowls for your breading stations. In the first bowl, place the 1.5 cups all-purpose flour. In the second bowl, beat the 2 whole large eggs until frothy. In the third bowl, place the 2 cups crushed cornflakes—this will create that iconic crispy crust without frying.
I like to arrange the bowls in a triangle on my countertop to streamline the breading process. The order matters: flour first, then egg wash, then cornflakes. This sequence ensures each layer adheres properly and creates that perfect textural contrast—crispy outside, tender inside.
Bread the Chicken Tenders
Remove the chicken from the marinade, letting any excess drip off (don't shake it—this prevents proper coating). Working in batches to avoid crowding, dredge each strip in the all-purpose flour, pressing gently to adhere. Shake off any excess, then dip into the beaten eggs, allowing any excess to drip off. Finally, roll the chicken in the crushed cornflakes, pressing firmly to ensure complete coverage.
Place the breaded tenders on a parchment-lined baking sheet. For extra crispiness, I recommend chilling them uncovered in the refrigerator for 15-20 minutes before baking. This step solidifies the cornflake coating and prevents it from falling off during baking.
Bake to Golden Perfection
Preheat your oven to 425°F and line a second baking sheet with parchment paper. Lightly grease the parchment with 2 tbsp olive oil—this prevents sticking and adds to the crispiness. Arrange the breaded chicken tenders in a single layer on the prepared baking sheet, spacing them about 1 inch apart to allow for even browning.
Bake for 18-22 minutes, flipping the tenders halfway through at the 10-minute mark. You're looking for deep golden brown color and internal temperature of 165°F when measured with an instant-read thermometer. The cornflakes should be crispy and the chicken tender enough to pull apart easily with a fork. If they brown too quickly, tent with foil for the last 5 minutes of baking.
Prepare and Toss in the Nashville Hot Sauce
While the tenders bake, prepare the signature sauce by combining 0.5 cup brown sugar, 0.25 cup apple cider vinegar, 1 tbsp smoked paprika, and 1 tbsp cayenne pepper in a small saucepan. Bring to a simmer over medium heat, stirring constantly until the sugar dissolves and the mixture thickens slightly—about 3-4 minutes. Let it cool for 5 minutes before using.
Once the tenders are baked, transfer them to a serving platter. Drizzle with the warm Nashville hot sauce and toss gently to coat evenly. For extra heat, you can broil the tenders for 1-2 minutes after tossing with the sauce to caramelize the sugar slightly. Serve immediately with your favorite dipping sauces or extra sauce on the side.
Pro Tips For Making Baked Nashville Hot Chicken Tenders
- Pound Chicken Thin: Skip the thick cuts—flatten each breast to ¼-inch thickness with a rolling pin or meat mallet. Thinner pieces cook faster and get that crispy crust without drying out. I used to fight with uneven thickness, then realized consistency is everything for even baking.
- Buttermilk Soak Time: Let the chicken marinate in buttermilk for at least 30 minutes—overnight is better if you’re planning ahead. The acid tenderizes the meat and helps the cornflake crust stick like glue. Trust me, the difference between 10 minutes and 12 hours is night and day.
- Double-Crust for Crunch: Press crushed cornflakes onto the chicken twice: once after the flour-egg dip, then again after baking. The first layer locks in flavor; the second adds extra crunch. It’s a little extra work, but the texture makes it worth it—like wearing two layers of armor.
- Bake Low and Slow: Start at 425°F for 10 minutes, then drop to 375°F for the remaining 15–20 minutes. High heat first crisps the crust, while lower heat finishes cooking the chicken without burning the cornflakes. I learned this after one batch of sad, rubbery tenders.
Creative variations of baked nashville hot chicken tenders
Spicy Variations
For those who love heat, swap the cayenne for Penzeys' hot sauce—add 1 tbsp to the buttermilk marinade and 1 tsp to the sauce. For a smoky kick, mix 1 tsp chipotle powder into the crushed cornflakes before coating. 🌶️
Sweet Heat Balance
Reduce the cayenne to 1 tbsp in the marinade and add 1 tsp honey to the sauce for a sweeter heat. The brown sugar already in the sauce will caramelize beautifully, creating a glossy, slightly sticky coating that balances the spice.
Gluten-Free Crisp
Replace the all-purpose flour with 1 cup gluten-free flour blend (like Bob's Red Mill 1:1) and use 1 cup crushed gluten-free cornflakes for the final coating. The texture stays crispy, but the breading is safe for gluten-sensitive diners.
Air Fryer Adaptation
Preheat your air fryer to 375°F and cook the tenders in batches for 10-12 minutes, flipping halfway. The cornflakes crisp up faster, so watch closely to avoid burning. This method cuts oil use by 70% while keeping the same crunch.
Extra Crunch Boost
Add 1 tbsp crushed potato chips (like Lay's Classic) to the crushed cornflakes for a salty, extra-crispy texture. The chips add a satisfying crunch that stands up to the heat, making every bite more satisfying. ✨
Game Day Party Hack
Double the recipe and bake the tenders on two sheets at once. Keep them warm in a 200°F oven for up to 30 minutes while you finish sides. Serve with cooling ranch and extra hot sauce for a crowd-pleasing spread.
Nutrition facts
Frequently asked questions
Why do I need to marinate the chicken overnight?
The overnight marinade in seasoned buttermilk is key for tender, flavorful tenders. The acidity in buttermilk breaks down proteins, while spices penetrate deeply. For best results, marinate at least 4 hours—overnight gives maximum flavor infusion without overpowering the chicken.
Can I use chicken thighs instead of breasts?
Yes, but adjust cooking time! Thighs stay juicier but may need 25-30 minutes at 400°F (they're thicker). Pound them to ½-inch thickness for even cooking. The skin adds richness, but remove it if you prefer the original recipe's texture.
How do I fix soggy breading?
Soggy breading usually means steam built up during baking. First, chill breaded tenders 15-20 minutes before baking to set the coating. Second, bake at 425°F with 1-inch spacing between pieces—crowding traps moisture. Third, use a wire rack on the baking sheet for airflow.
What's the best way to store leftovers?
Cool tenders completely, then store in an airtight container for 3 days refrigerated. For longer storage, freeze for up to 2 months. Reheat in an air fryer at 375°F for 3-4 minutes—this restores crispiness better than a microwave. Never reheat from frozen.
Can I make this recipe ahead of time?
Prep everything up to the breading stage, then refrigerate breaded tenders (unbaked) for up to 24 hours. Bake straight from the fridge—just add 2-3 extra minutes to the cooking time. The sauce can be made 1 day ahead and reheated gently before tossing with tenders.