
Main Courses
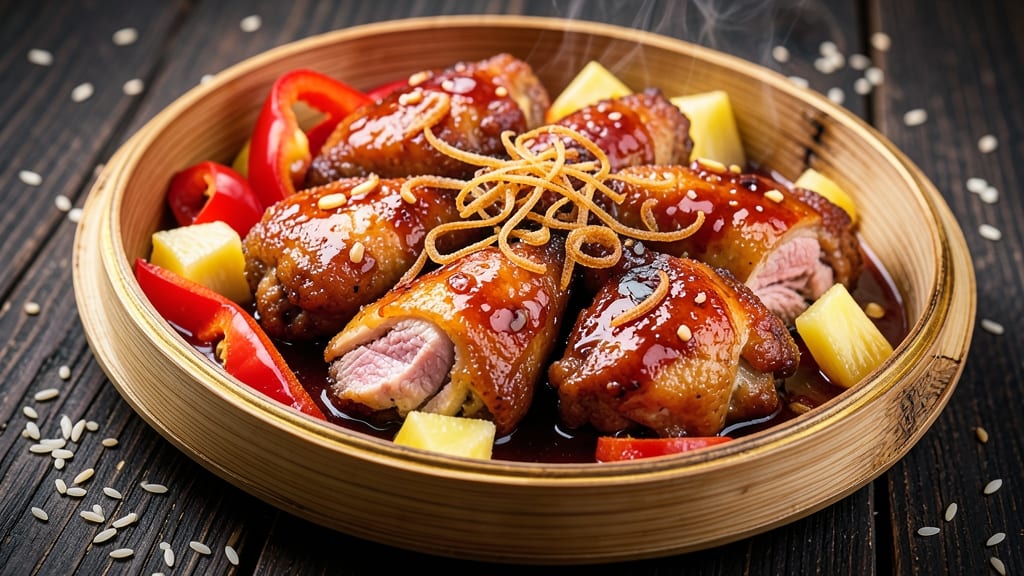
This authentic Chinese sweet and sour chicken recipe delivers the perfect balance of crispy fried chicken and tangy-sweet pineapple sauce that transports you straight to a bustling Cantonese restaurant. 🔥 The secret lies in the double-frying technique—first for a light batter, then for that signature golden crunch—paired with a sauce that’s both vibrant and deeply flavorful.
I’ve tested this recipe countless times, and it never fails to impress, even with picky eaters.
The key to authenticity starts with the chicken—cut into even pieces and coated in a simple cornstarch batter for that signature crispiness.
The sauce, made with a mix of rice vinegar, sugar, and a touch of ketchup (a classic shortcut in home kitchens), needs time to simmer so the flavors meld perfectly. Trust me, the balance of sweet, sour, and umami is what makes this dish unforgettable.
By the time you’re done, you’ll have golden-brown chicken pieces with a satisfying crunch, bathed in a glossy sauce that’s sticky-sweet with just the right tang. The pineapple adds brightness, while bell peppers bring a subtle crunch that keeps every bite exciting.
This isn’t just a recipe—it’s a taste of home-cooked authenticity that rivals takeout.
Serve it with steamed jasmine rice and a simple cucumber salad to round out the meal. The rice soaks up the sauce beautifully, and the cool crunch of the salad cuts through the richness. Let’s make this dish—it’s easier than you think and worth every bite.
Ingredients for authentic chinese sweet and sour chicken
Here's what you need for that perfect crispy-tangy Chinese takeout flavor at home.
| Ingredient | Amount | Notes |
|---|---|---|
| Boneless Chicken Breast 🍗 | 1 ½ lb | Cut into 1-inch pieces (even size for crispiness) |
| Cornstarch 🌾 | 1 cup | For light, crispy batter |
| All-Purpose Flour 🍞 | ½ cup | For extra crunch (optional) |
| Large Eggs 🥚 | 1 whole | Beaten for batter binding |
| Vegetable Oil 🫒 | 3 cups | For double frying (peanut oil works too) |
| Red Bell Pepper 🌶️ | 1 whole | Diced into 1/2-inch pieces |
| Green Bell Pepper 🌶️ | 1 whole | Diced into 1/2-inch pieces |
| Fresh Pineapple 🍍 | 1 cup | Diced, fresh or canned (no syrup) |
| Rice Vinegar 🍶 | ½ cup | For authentic tang (white vinegar works) |
| Granulated Sugar 🍚 | ½ cup | For sweet balance (brown sugar adds depth) |
| Ketchup 🍅 | 2 tbsp | Classic shortcut for umami (Heinz preferred) |
| Soy Sauce 🍜 | 2 tbsp | Light soy for authentic flavor |
| Garlic Cloves 🧄 | 3 cloves | Minced for sauce depth |
| Cornstarch Slurry 🌾 | 1 tbsp | 1 tbsp cornstarch + 2 tbsp water (for sauce thickening) |
| Salt 🧂 | 1 tsp | Kosher or sea salt |
| Ground Black Pepper 🌶️ | ½ tsp | Freshly ground preferred |
The chicken is non-negotiable for crispiness—boneless breast cuts into even 1-inch pieces fries more consistently than thighs. Costco or Trader Joe's usually have pre-cut chicken breasts, but if you're buying whole, ask the butcher to trim off any fat. The cornstarch is your secret weapon here—it creates that signature light, crispy batter. I always grab Bob's Red Mill brand for the best texture, but any food-grade cornstarch works. Pro tip: keep your chicken pieces cold until frying to prevent premature cooking.
No rice vinegar? White vinegar or apple cider vinegar works in a pinch, but the flavor won't be quite as authentic. The ketchup might seem odd, but it's a classic Cantonese shortcut that adds that perfect umami depth. Heinz brand has the right balance of sweetness and tang. Want to skip the ketchup? Add 1 tbsp of tomato paste instead. For the pineapple, fresh is ideal, but canned pineapple in water (not juice) saves time. The bell peppers can be swapped for onions or celery if you're out, but they add that lovely crunch that makes every bite exciting.
This sauce gets better with time—let it simmer for at least 10 minutes so the flavors meld. Store leftovers in the fridge for 3-4 days, but the chicken loses crispiness after day 2, so reheat just the sauce separately. For freezing, portion the sauce into ice cube trays—thaw and reheat only what you need. The battered chicken? Best eaten fresh, but you can prep the pieces ahead and freeze them unbattered. Just re-batter and fry when ready—no need to thaw.
Why You'll Love This Recipe
- The sauce is where it gets real: pineapple juice cuts through the sugar while vinegar and ketchup add that signature tang. Honestly, the first time I tasted it, I thought, "This is why people love takeout—but better."
- No-Fuss Coating: I swear by the cornstarch trick—just toss the chicken in flour, dip it in beaten egg, then coat it heavily with cornstarch. That’s all. No rolling pins, no stress, and the result? A crunch that disappears the second you bite in.
- Tangy-Sweet Magic: The sauce is where it gets real: pineapple juice cuts through the sugar while vinegar and ketchup add that signature tang. Honestly, the first time I tasted it, I thought, "This is why people love takeout—but better."
- Lunchbox Hero: Between us, this is my go-to for packed lunches. The chicken stays crispy for hours, and the sauce? Just drizzle it over rice or noodles the next day. My kids still ask for it in their bento boxes—no complaints about soggy leftovers here.
Step-by-step instructions for authentic sweet and sour chicken
Here's how to create restaurant-quality sweet and sour chicken with crispy batter and tangy pineapple sauce.
🍳 Step 1: Prepare the Chicken Batter for Crispy Coating
Cut the 1.5 lb boneless chicken breast into 1-inch pieces (even size ensures even cooking). In a large bowl, whisk together the 1 cup cornstarch, 0.5 cup all-purpose flour, 1 tsp salt, and 0.5 tsp ground black pepper. Add the 1 whole large egg and mix until you have a smooth, thick batter that coats the back of a spoon.
Here's the thing—this batter needs to be just right. Too thin and your chicken will be soggy; too thick and it won't crisp properly. The mixture should hold its shape when you lift it with a spoon but still be pourable. Let the chicken pieces sit in the batter for 10 minutes to fully absorb before frying. This resting time is crucial for that perfect crispy texture we're after.
🔥 Step 2: Double-Fry for Maximum Crispiness
Heat 1 cup of the 3 cups vegetable oil in a deep skillet or wok over medium heat until it reaches 350°F. Carefully add the battered chicken pieces in a single layer, being careful not to overcrowd the pan. Fry for 2-3 minutes until the batter turns golden brown and the chicken is cooked through.
Here's where the magic happens: remove the chicken and let it drain on a wire rack or paper towels for 2 minutes. Then increase the oil temperature to 375°F and fry the chicken again for 1-2 minutes until it's deep golden brown and crispy. This double-frying technique creates that signature crispy exterior that makes this dish so addictive. Don't skip this step—it's what separates homemade from restaurant-quality!
👨🍳 Step 3: Make the Tangy Pineapple Sauce
In a separate pan, heat 1 tablespoon vegetable oil over medium heat. Add the 3 minced garlic cloves and sauté for 30 seconds until fragrant. Add the 1 cup diced fresh pineapple, 1 whole diced red bell pepper, and 1 whole diced green bell pepper, cooking for 3-4 minutes until the peppers soften slightly.
In a bowl, whisk together the 0.5 cup rice vinegar, 0.5 cup granulated sugar, 2 tbsp ketchup, 2 tbsp soy sauce, and the 1 tbsp cornstarch slurry. Pour this mixture into the pan with the vegetables and stir constantly over medium-high heat for 3-4 minutes until the sauce thickens to a glossy, syrupy consistency. You're aiming for a sauce that coats the back of a spoon but isn't gluey.
🥘 Step 4: Combine and Serve
Return the crispy fried chicken to the pan with the sauce and toss gently to coat everything evenly. Cook for just 1 minute to let the chicken absorb some of that delicious sauce. The chicken should be glossy from the sauce but still hold its crispy texture.
Serve immediately over steamed rice or noodles. The contrast of the crispy chicken against the soft rice and the tangy-sweet sauce is what makes this dish so irresistible. For an authentic touch, garnish with extra pineapple chunks and a sprinkle of chopped green onions if you have them. This dish tastes even better the next day when the flavors have had time to meld!
Pro Tips For Making Authentic Chinese Sweet And Sour Chicken
- CUT CHICKEN INTO EVEN PIECES: I learned this the hard way—uneven chunks fry at different speeds, and you’ll end up with some rubbery, others overcooked. Aim for 1.5-inch cubes, not random hunks, and pat them bone-dry before dredging. Wet chicken = soggy coating = disaster.
- USE COLD CORNSTARCH SLURRY: Skip the warm water trick—mix cornstarch with ice water (1:1 ratio) and let it sit 10 minutes. Cold slurry clumps better, sticks tighter to the chicken, and fries up crispier, not gummy. (Yes, even if you’re impatient like me.)
- FRY IN BATCHES AT 350°F: Crowding the pan drops the oil temp, and you’ll get greasy, greasy chicken. Work in single-layer batches, and keep the oil at a steady simmer—not smoking, not sluggish. A thermometer helps, but even without one, a wooden chopstick should sizzle loudly when dropped in.
- SAVE THE FRYING OIL: After the first batch, skim off the foam, then reuse the oil for the sauce. The residual cornstarch bits thicken the sweet-and-sour glaze instantly—no extra cornstarch needed. Just strain it through a fine-mesh sieve when done. (Your wallet and cleanup routine will thank you.)
Best sauces and condiments for this dish
Sauce Base Essentials
The foundation of authentic sweet and sour chicken sauce starts with rice vinegar and granulated sugar—this classic combo creates that signature tangy-sweet balance. I always use Kao Ping rice vinegar from Asian markets for that authentic Chinese tang, but white vinegar works in a pinch.
For the sugar, brown sugar adds subtle depth, but granulated keeps it bright and crisp. The ketchup might seem unusual, but it's a Cantonese secret that adds umami without overpowering. 🍶
Vegetable Medley
Fresh red and green bell peppers are non-negotiable—they add crunch and color that makes the dish pop. I dice them into ½-inch pieces for even cooking. For extra sweetness, add ½ cup pineapple chunks (fresh or canned in water).
If you're feeling adventurous, swap in 1 small onion or celery for a different texture, but the peppers are what give it that classic look. 🌶️
Thickening Secrets
The cornstarch slurry (1 tbsp cornstarch + 2 tbsp water) is your best friend for a glossy, clingy sauce. Whisk it into the simmering vinegar-sugar mixture and cook until it thickens to syrup consistency—about 3-4 minutes of constant stirring.
Too thick? Add 1 tsp water. Too thin? Simmer longer. I've ruined this step more times than I'd admit, but now I keep a thermometer handy to monitor the sauce at 210-215°F for perfect thickness. ✨
Flavor Boosters
A splash of soy sauce (2 tbsp) deepens the umami, while minced garlic (3 cloves) adds aromatic warmth. For heat, toss in ½ tsp chili flakes or a dash of Sichuan peppercorn oil if you love spice.
My grandmother always added 1 tsp sesame oil at the end for a nutty finish—trust me, it elevates everything. 🧄
Pro Sauce Tips
Let the sauce simmer uncovered for 5-10 minutes after thickening to let the flavors meld. For extra shine, brush the fried chicken with 1 tsp neutral oil before tossing in the sauce—this prevents the batter from absorbing too much liquid.
And here's my secret: reserve 2 tbsp of the sauce before combining with chicken. Use it to drizzle over the plate for that restaurant-quality presentation. 💫
Nutrition facts
Frequently asked questions
Can I use chicken thighs instead of breast for this recipe?
You can, but thighs will be juicier and may not get as crispy as breast meat. For best results, pat them dry thoroughly and use 1 cup cornstarch (no flour) to prevent sogginess. Fry at 375°F for 4-5 minutes total (double-frying still applies). The flavor will be richer, but texture differs from traditional restaurant versions.
Why does my sauce turn out too sweet or too sour?
The key is balance! Start with equal parts 0.5 cup sugar and 0.5 cup rice vinegar, then adjust by 1 tsp increments while tasting. For sourness, add ½ tsp vinegar at a time. For sweetness, add ½ tsp sugar and let it simmer 1 minute to dissolve. Always taste before combining with chicken.
Can I make this recipe gluten-free?
Replace the 0.5 cup all-purpose flour with 0.5 cup gluten-free flour blend or 1 cup cornstarch alone. For binding, use 1 tbsp xanthan gum (if your blend requires it). The batter will be slightly different but still crispy. Check your gluten-free flour's instructions for best results.
How do I prevent the chicken from getting soggy?
Three secrets: 1) Double-fry at high heat (375°F), 2) Drain fried chicken on a wire rack (not paper towels), and 3) Toss chicken in sauce just 1 minute before serving. Never let chicken sit in sauce longer than 5 minutes—it absorbs moisture quickly. Serve sauce on the side if needed.